In preparation for our round the world trip, I am keen to learn how to take some more decent photographs.
Step 1 – Buy a camera…
This sounds pretty simple, until you realise the seemingly infinite number of options available.
Being largely clueless, I decided to pay a visit to my local Jessops. After nearly an hour of my stupid questions, I finally left the store with a shiny new Panasonic.
For those interested, it was a Lumix DMC-GX80, a mirrorless digital camera with 12-35mm zoom lens.
This seemed to suit my purposes as it was fairly compact and robust looking, but with enough features to keep me occupied.
Step 2 – Take camera home…
Things seem to have moved on since I last owned a camera in the 1990’s. I have also gotten used to pointing my iPhone and pressing click.
My new camera has an assortment of buttons, dials and menu options, all of which mean absolutely nothing to me.
I open the instruction menu. This doesn’t really help. There appears to be an assumed level of photographic knowledge, which I do not possess.
I manage to charge the camera and put on the shoulder strap, just.
Step 3 – Learn how to use camera…
I decide to strike while the iron is hot and book myself onto a beginner’s 1-day photography course.
My expectations are low, as I realise there are more buttons on my camera than I could possibly learn in one day. But you have to start somewhere, and so I find myself lining up with eight other photography novices on Saturday morning.
What follows is my very basic interpretation of what I have learned so far. Please stop reading now if you are a real photographer, as this may be painful, but hopefully it will be useful if you know as little as I do.
Lesson 1 – Aperture
Button A – seems simple enough so far…
Aperture, in my simplistic terms, means the size of the hole in the camera lens.
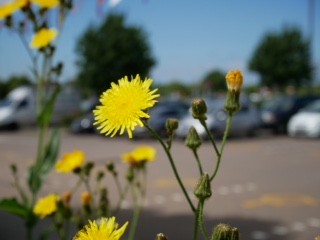
If you have a large, wide hole in the lens, this means more light is allowed into the camera and you create a shallower depth of field. This is useful when you want to focus on an object that is near to you or when there is low light (picture below).
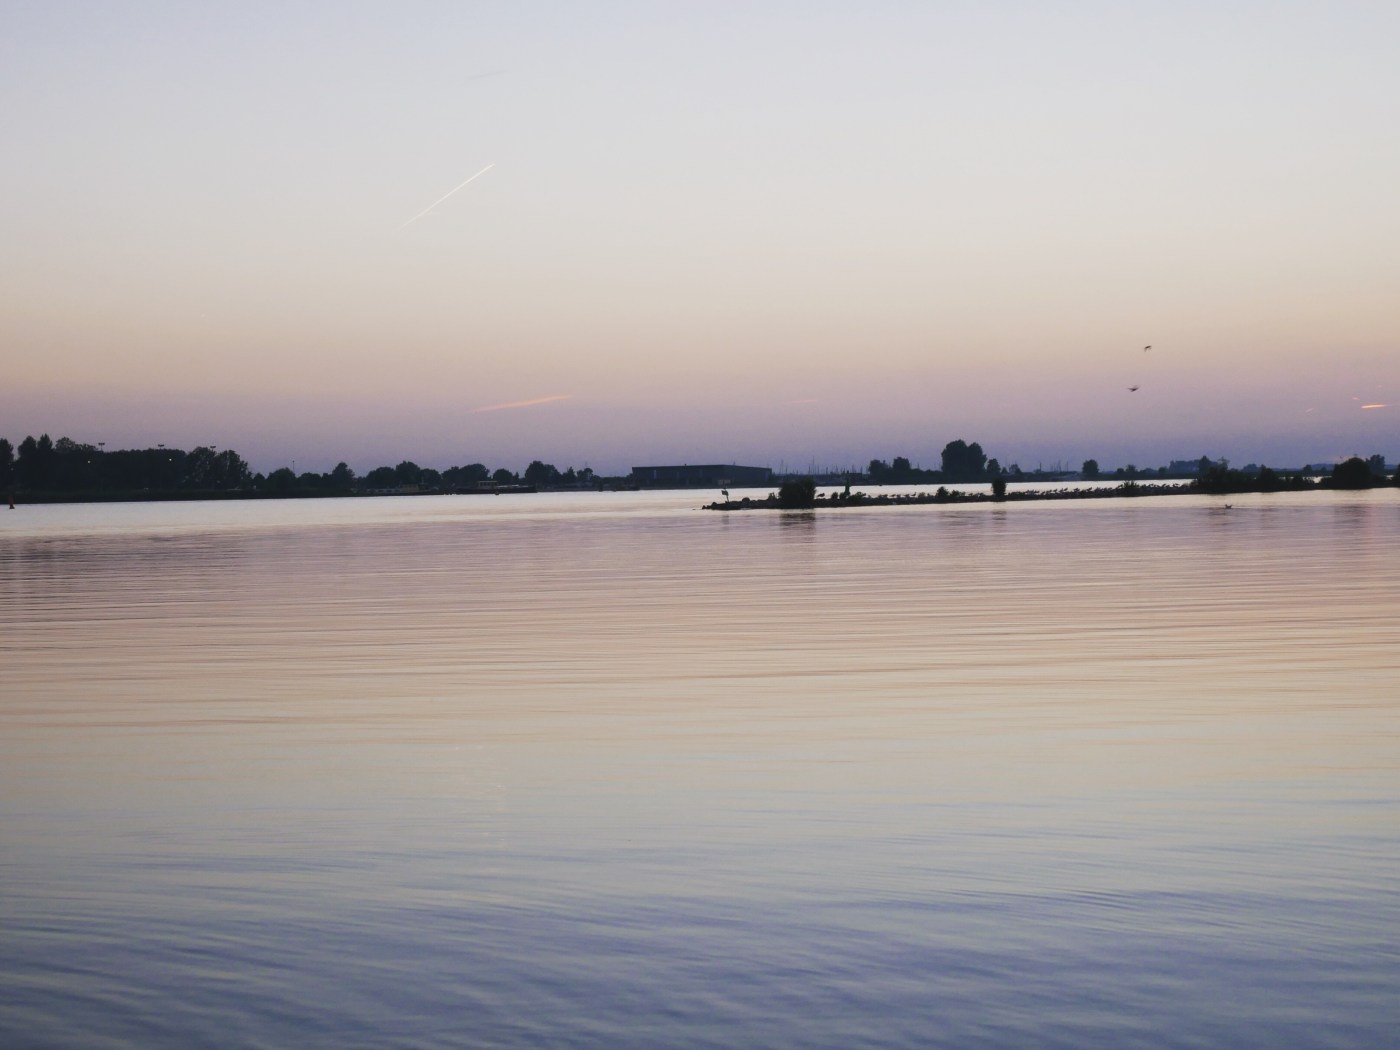
Why would you want to use a high aperture (f22) / small lens hole? This will allow less light to enter the camera, but will give more depth of field. This would be useful for landscape shots, where you want to maintain focus over a longer distance (picture below).

Aperture values are shown as “f” values on the camera, starting in my case with f3.5 and going up to f22. These values represent the ratio of the lens size to the maximum available lens, so f3.5 is the largest possible size and f22 is the smallest. This may seem like the wrong way around, but if you can remember that these numbers represent a size ratio perhaps that will help. Otherwise you just have to remember:
- Large aperture = small f value
- Small aperture = large f value
When operating in Aperture mode, the camera will automatically adjust the other exposure variables (Shutter Speed & ISO) in an attempt to balance the amount of light in your pictures.
This three-way balancing act is what we are now about to explore further…
Lesson 2 – Shutter Speed
Button S
A high shutter speed is required to capture sharp, crisp images, with the camera fixing the image in micro-fractions of a second.
For example, a flying bee could be captured still at 1/500 of a second. My camera can theoretically go as fast as 1/4000 of a second, which seems unfathomably quick.
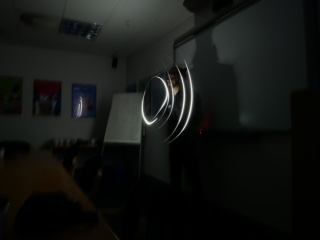
A slow shutter speed, on the other hand, can capture an image over multiples of seconds, and anything up to 30 whole seconds. This makes it possible to capture a sense of movement (picture below).

The trade-off here is a question of light.
More light can enter the camera if the shutter speed is slow, whereas less light will be able to enter as the shutter speed increases.
So, to take a picture with a fast shutter speed will require more light to be available. This might be down to environmental conditions and the time of day. But, also, you can get more light into the camera by choosing a larger aperture.
This is where you might need to start experimenting with your own camera to find the right combinations of aperture and shutter speed for different types of pictures:
- Try using a fast shutter speed (1/5oo seconds) to capture a picture and then see what happens to the light as you adjust the aperture up and down
- Try the same adjustments but with a slow shutter speed (1 second+)
If it is a bright day, then you might find that you struggle to get any useful pictures with a slow shutter speed no matter what aperture you select. This is because too much light is entering the camera when it is left “open” for a longer time. The picture below shows how we experimented with slow shutter speeds in a dark room:
Lesson 3 – ISO
Button ISO
ISO indicates how sensitive the image sensor is to light, starting from a low sensitivity of 200-400 ISO, and building up to a high sensitivity of up to 35,000 ISO.
ISO is an international standard measurement of light sensitivity. If you still have camera film, then the ISO value is shown on the film packet.
When using the camera in Aperture or Shutter speed modes, the camera automatically selects the ISO based on the amount of available light.
On the face of it the ISO sounds like a holy grail, as simply changing this value can correct for any over or under-supply of light in your photos.
However, as the ISO value increases, this can have a detrimental impact on the quality of your photos, especially if you are planning to have them printed. As the ISO increases, pictures become grainier, as the camera effectively starts to construct light in the pictures where none really exists.
Unless you want a grainy photo, then the aim should be to use aperture and shutter speed to obtain the lowest possible ISO.
It is possible to fix the ISO value manually, rather than leaving this to the camera to choose. If you fix the ISO at 400 then there shouldn’t be any issues taking pictures in normal daylight, assuming you can now also experiment with aperture and shutter speed.
The ability to select higher ISO values could still be useful, if you wanted to take a picture in darker conditions and it wasn’t practical to extend the shutter speed to multiple seconds. For example, capturing the moment before the candles are blown out on a birthday cake, when the lights are off.
Summary – What Is Exposure and How Can You Control?
Again, this is my simplistic interpretation, so not meant for professionals!
The combination of Aperture (size of hole in lens); Shutter speed (length of time over which image is captured); and ISO (light sensitivity) is what determines the exposure of your photographs.
- Underexposed photo will look dark – increase Aperture (bigger lens hole = lower f value); reduce Shutter speed; increase ISO.
- Overexposed photo will look too light and appear washed out – decrease Aperture (smaller lens hole = higher f value); increase Shutter speed; decrease ISO.
It will be a process of trial and error to understand what combination of these three variables works best for you. This will depend on the style of picture that you are trying to achieve; how close you are to your object; whether the object is still or moving; and the level of available light.
And finally, how much any of this all matters is really up to you. You could just leave your camera in “auto-pilot” mode and get some amazing photographs. But, if like me, you would like to improve your understanding of how to take different types of pictures, then experimenting with these basic components of your camera should be a good start.
